If you’re like many of my local business clients, you’re probably wondering “How do I build my email list quickly?” There are quite a few ways to build your email list, which in turn, can be used to market directly to your existing and potential customers, which hopefully will increase your bottom line. Customers who want to be included in your email distribution list are excited to hear what you have to say and enjoy receiving emails from you, and you should make it really easy for them to find your signup form.
With this in mind, I always recommend integrating between 5-10 different places for your customers to sign up for your email list. Some customers will consistently visit your blog or your Facebook page, or maybe only your Twitter page, so it’s a good idea to have sign up forms in all of these places to increase the chances of growing your list.
In this blog post, I’ll be covering how to add a Mailchimp Email Signup To Your Facebook Page.
Assuming you have a MailChimp account, (if not, you can sign up here for a free email account from Mailchimp), go ahead and login to your account.
Step 1: In the left sidebar, you will see your account name; click on your name > Account Settings > Integrations. Scroll down to the Facebook app and click on it. A “log in” button will appear and you will need to click the button.
Mailchimp will ask you a series of 3 questions, and you will need to agree to each question in order to set up the integration properly.
Step 2: Once complete, you will be able to select a ‘page’ for Mailchimp to manage, as well as the list that you would like to send the sign ups to. Select ‘yes’ where it asks if you would like to “Use signup form tab’ and keep the Form Theme as the default. Under ‘Tab Label’ I always use the word “Signup” or “Signup!” to draw attention, or something similar.
This will be the text that is displayed at the top of your Facebook page in the tabs section.

Once these steps are complete, click ‘SAVE,’ and you’re all set!
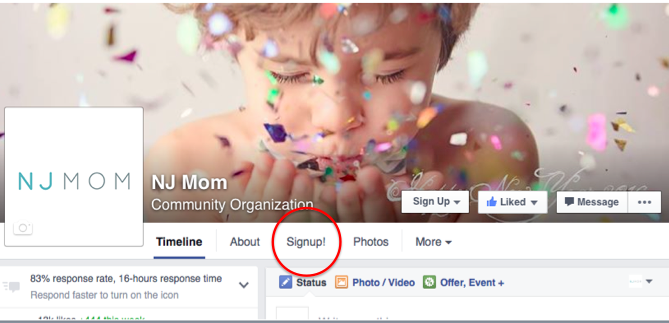
Now, go over to your Facebook page and check that the signup form has been added to the navigation bar. If it’s not visible, click the ‘more’ button and select ‘manage tabs.’ Here you can drag and drop the signup form to the top of the list under “About.”
![]()
Now you’re ready to announce that you’ve added an email signup to your Facebook page and invite your followers to sign up for your email list.
You can do this by capturing a screen shot of your navigation bar with the new “Signup” tab, composing a status update with the screen shot and a message welcoming users to sign up for your email list. Including ‘why’ they should sign up is always a great idea when composing the message.
Here are some general ideas for your status update letting followers know you’ve added a Mailchimp email signup form to Facebook
“Sign up to receive our newsletter with weekly Editor’s Picks only for our email subscribers!”
“Sign up for local offers from our exclusive partners!”
“Sign up to receive exclusive offers only for my email subscribers! I will never share these secrets anywhere except with members on my email list. Don’t be the last to know!”
And, be sure to include the direct link to the sign up form to make it really easy for subscribers to sign up.
You can obtain this link by clicking on the Signup form and copying/pasting the URL.
There’s just one final step if you’d like to improve the aesthetics of your page.
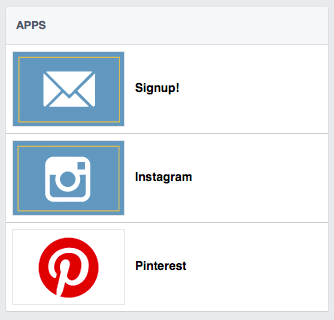
Scroll down your Facebook page to the “APPS” section. There you should see your new Mailchimp Email Signup App. You can design a cover image for your “Sign Up” tab, and your other tabs by using a local designer or free programs such as Canva.

If you would like to update this, click “Settings” all the way at the top of your Facebook page. Then click, “Apps’ on the left side bar, and find the MailChimp app.
Click “Edit settings’ and then click “Change” next to Custom Tab Image. Upload your new image and click “Save.”
You’re all set!
You’ve successfully added a Mailchimp email signup tab to your Facebook page, updated the aesthetics of your page and announced your new email signup form to followers. Be sure to remind followers about once/ month to sign up for your email list and you will watch your list grow steadily over time.
Best of luck building your email list and be sure to check back for future posts on adding additional email signup forms to your website and Twitter pages.


